We’re starting this new blog with highlighting and contouring. On our Instagram account, @lrajotte87 asked, "How to use the highlighting and contouring powders properly and what size brush to use for the different areas of your face?"
Great questions @lrajotte87. First of all, let’s address what highlighting and contouring is, and what products she’s referring to.
Highlighting uses light shades to brighten areas of your face. Generally, the areas of your face you want to highlight are the cheekbones, the t-zone and under your eyes. In this blog, we’ll be addressing highlighting the cheekbones and t-zone.
Contouring is the opposite of highlighting. It uses a shade slightly darker than your skin tone to create structure or symmetry to your face. Most often, people contour the hollows of their cheeks, along the sides of the nose, in the hairline (outer edge of forehead), and under the jawline. We’ll address all these areas in this blog.
When @lrajotte87 refers to our highlighting and contouring powders, she is referring to two shades called Ethereal and Lustrous highlighters, and 2 shades of contour powders called Alluring and Beguiling. Ethereal is a cool undertone highlighter (light pink undertone, slight shimmer). Lustrous is a warm toned highlighter (light gold undertone, slight shimmer). Use whichever one suits your skin tone best. Alluring contour powder is a light-medium cool toned powder (matte). Beguiling contour powder is a deep, slightly warm contour shade (matte).

Highlighting:
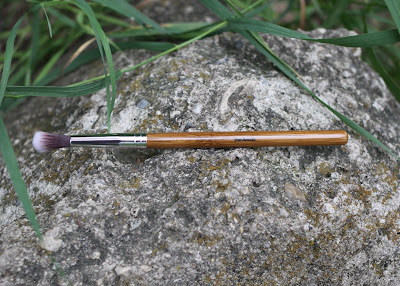
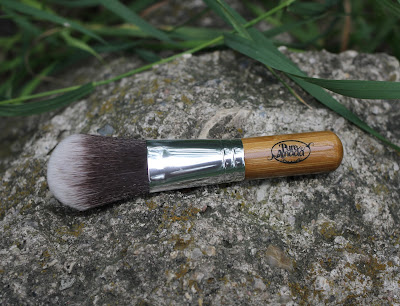
There are a few brushes you could use to apply the highlighters. On the cheekbones and on the bridge of my nose, I tend to use our Tapered Blending Eye Brush. You get a decent amount of control with this brush. A fan brush works great for highlighter. But if you want to get a really diffused look, I would even suggest using our Blush Brush with just a light amount of the powder on the tip.
You can also highlight the inner corners (tear duct) of the eyes and under the arch of the brow, which I highly recommend especially for those who deal with dark under eye circles. To apply color in the tear duct, I recommend using our Contour Crease Brush, and under the brow arch I recommend using the Tapered Blending Eye Brush.
Contouring:
We have created 2 shades of matte contour powder, because matte is the only way to go with contouring. If you use anything with shimmer to contour, you’re going to be left with a dirty looking face. Yuck!
To contour the hairline, hollows of the cheeks (under the cheekbones), and along the bottom of your jawline, I use our Blush Brush. I take the powder from the lid of the container, and not from the container directly. Always start with just a small amount on your brush, and build the coverage. It is much easier to control the look if you start with less and then add more. It is SO important that you blend the contour so it’s not an obvious stripe. I use our Flat Top Foundation Brush to blend in the contour. Just blend the edges, you don’t have to smudge it all in.
Contouring along the sides of the nose requires great lighting and a smaller brush. Use the Tapered Blending Eye Brush for this. Start with just the smallest amount of contour powder on the tip of the brush, and draw straight lines down along the sides of the bridge of the nose. This creates the look of a straighter nose, and if you want, it can make the nose look thinner. You might also need to take your Flat Top Foundation Brush to blend the edges. Contouring the nose takes a lot more effort and time to perfect than contouring the rest of your face. So give yourself time to get the hang of it! Start light and then as you get more experienced, you can make it more dramatic if you wish.
When applying any makeup, it’s best to have good lighting to ensure a well-blended look. And when in doubt, just keep blending! As always, if you have any questions you would like me to address email me (Kristen) at kristen@pureanada.ca.
BRUSHES USED:
 |
| Tapered Blending Eye Brush |
 |
| Blush Brush |
 |
| Contour Crease Brush |
 |
| Flat-Top Foundation Brush |


Post a Comment